
How I Switched to a Custom Domain on Blacksky
After migrating to Blacksky some weeks ago, I wanted to return to my custom handle as well. The instructions I found were Bluesky-specific, so I captured some screenshots as I went along in case it might help others who want to switch from a blacksky.app handle to using a custom domain instead.
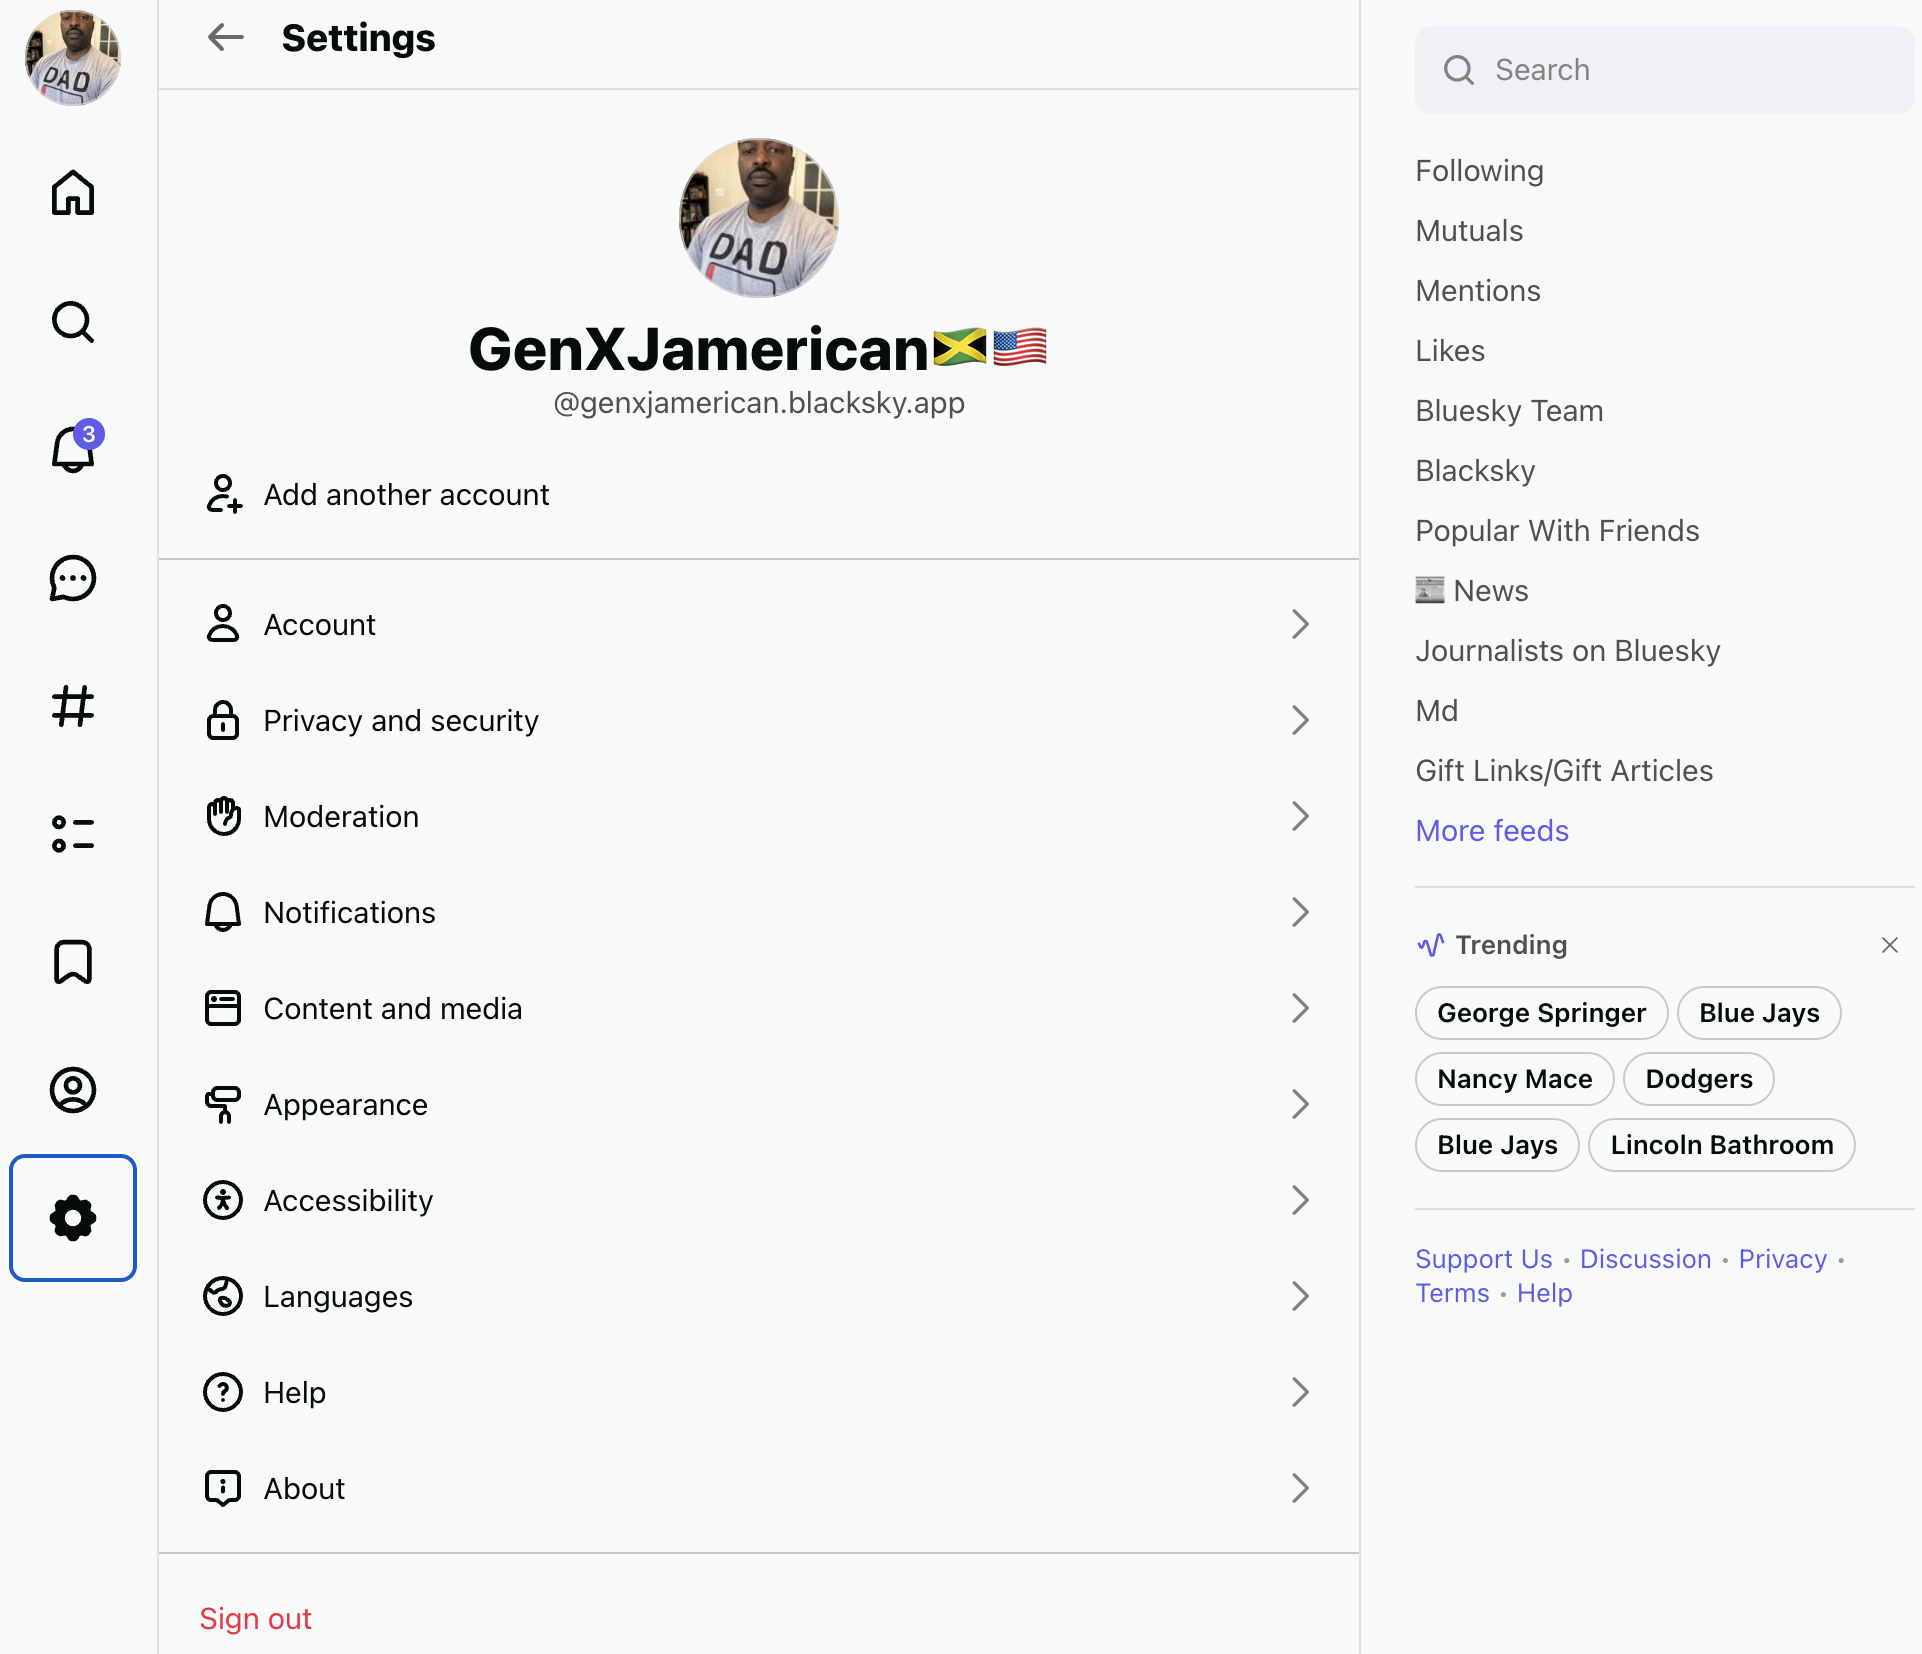
Once you’re logged into blacksky.community, click the Settings button (gear symbol) at the bottom of the left navigation in your browser window. You should see something like this:
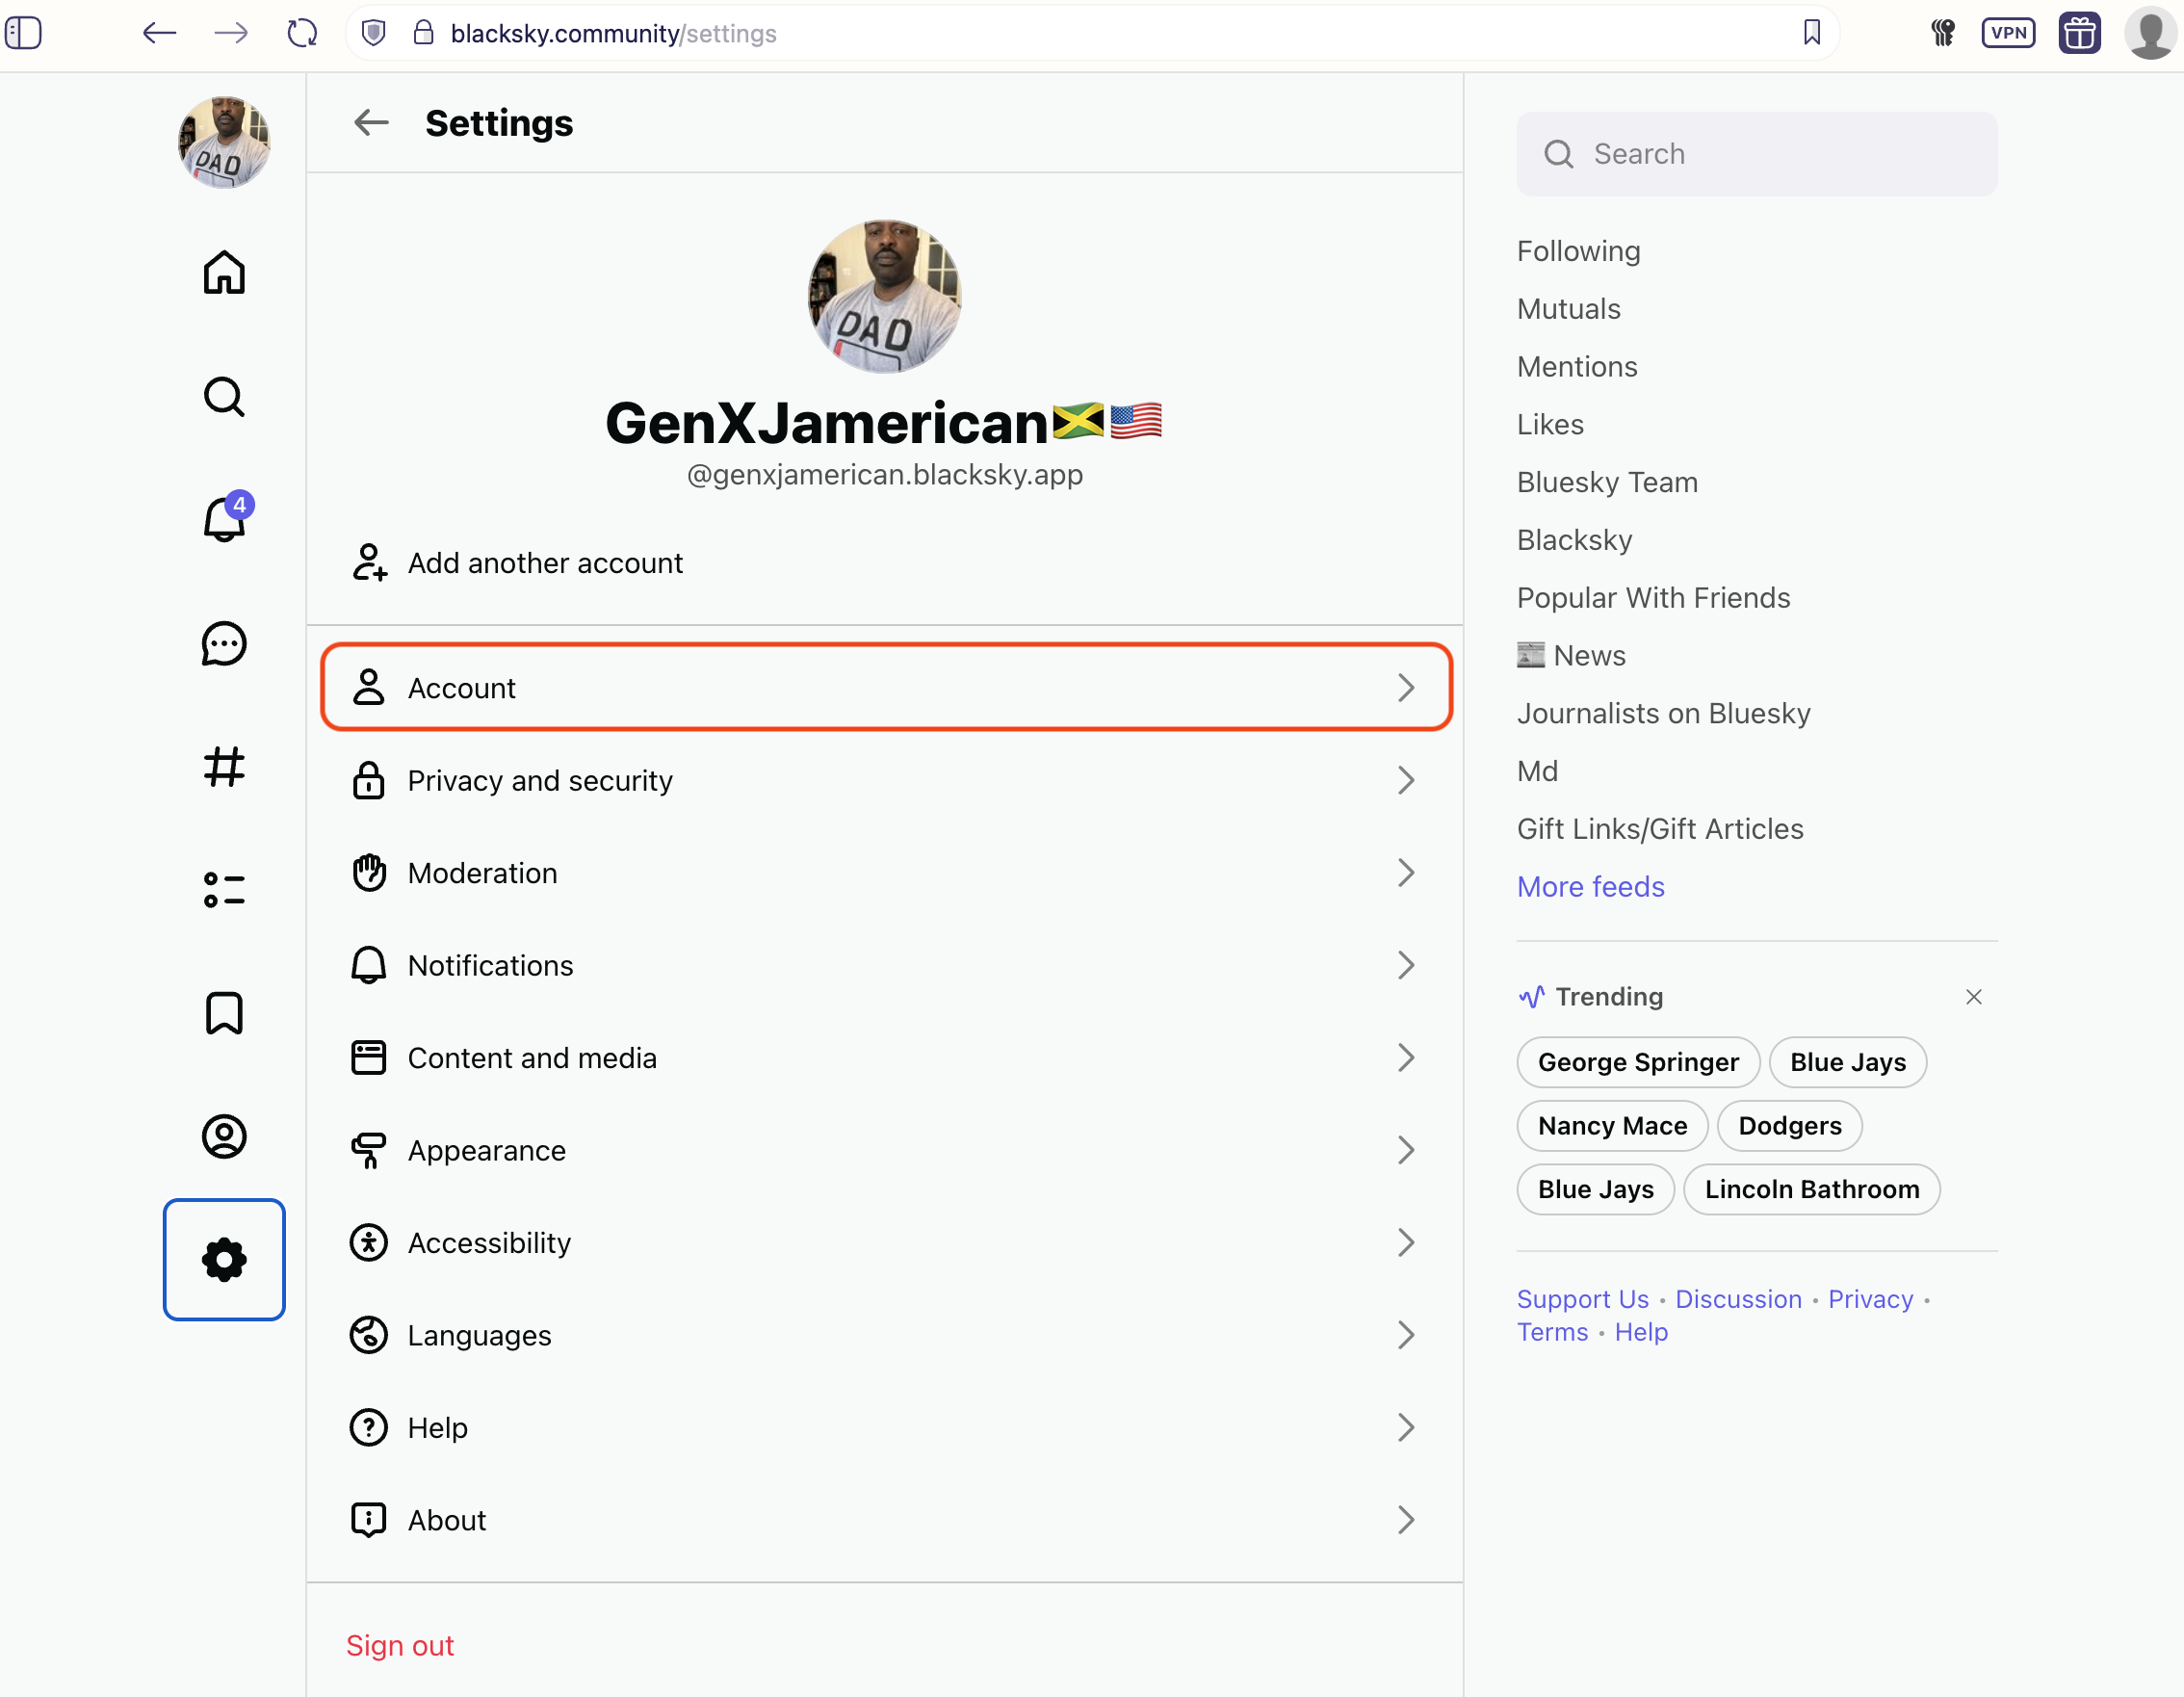
Next you’ll click on Account, shown here:
Now you should see the following:
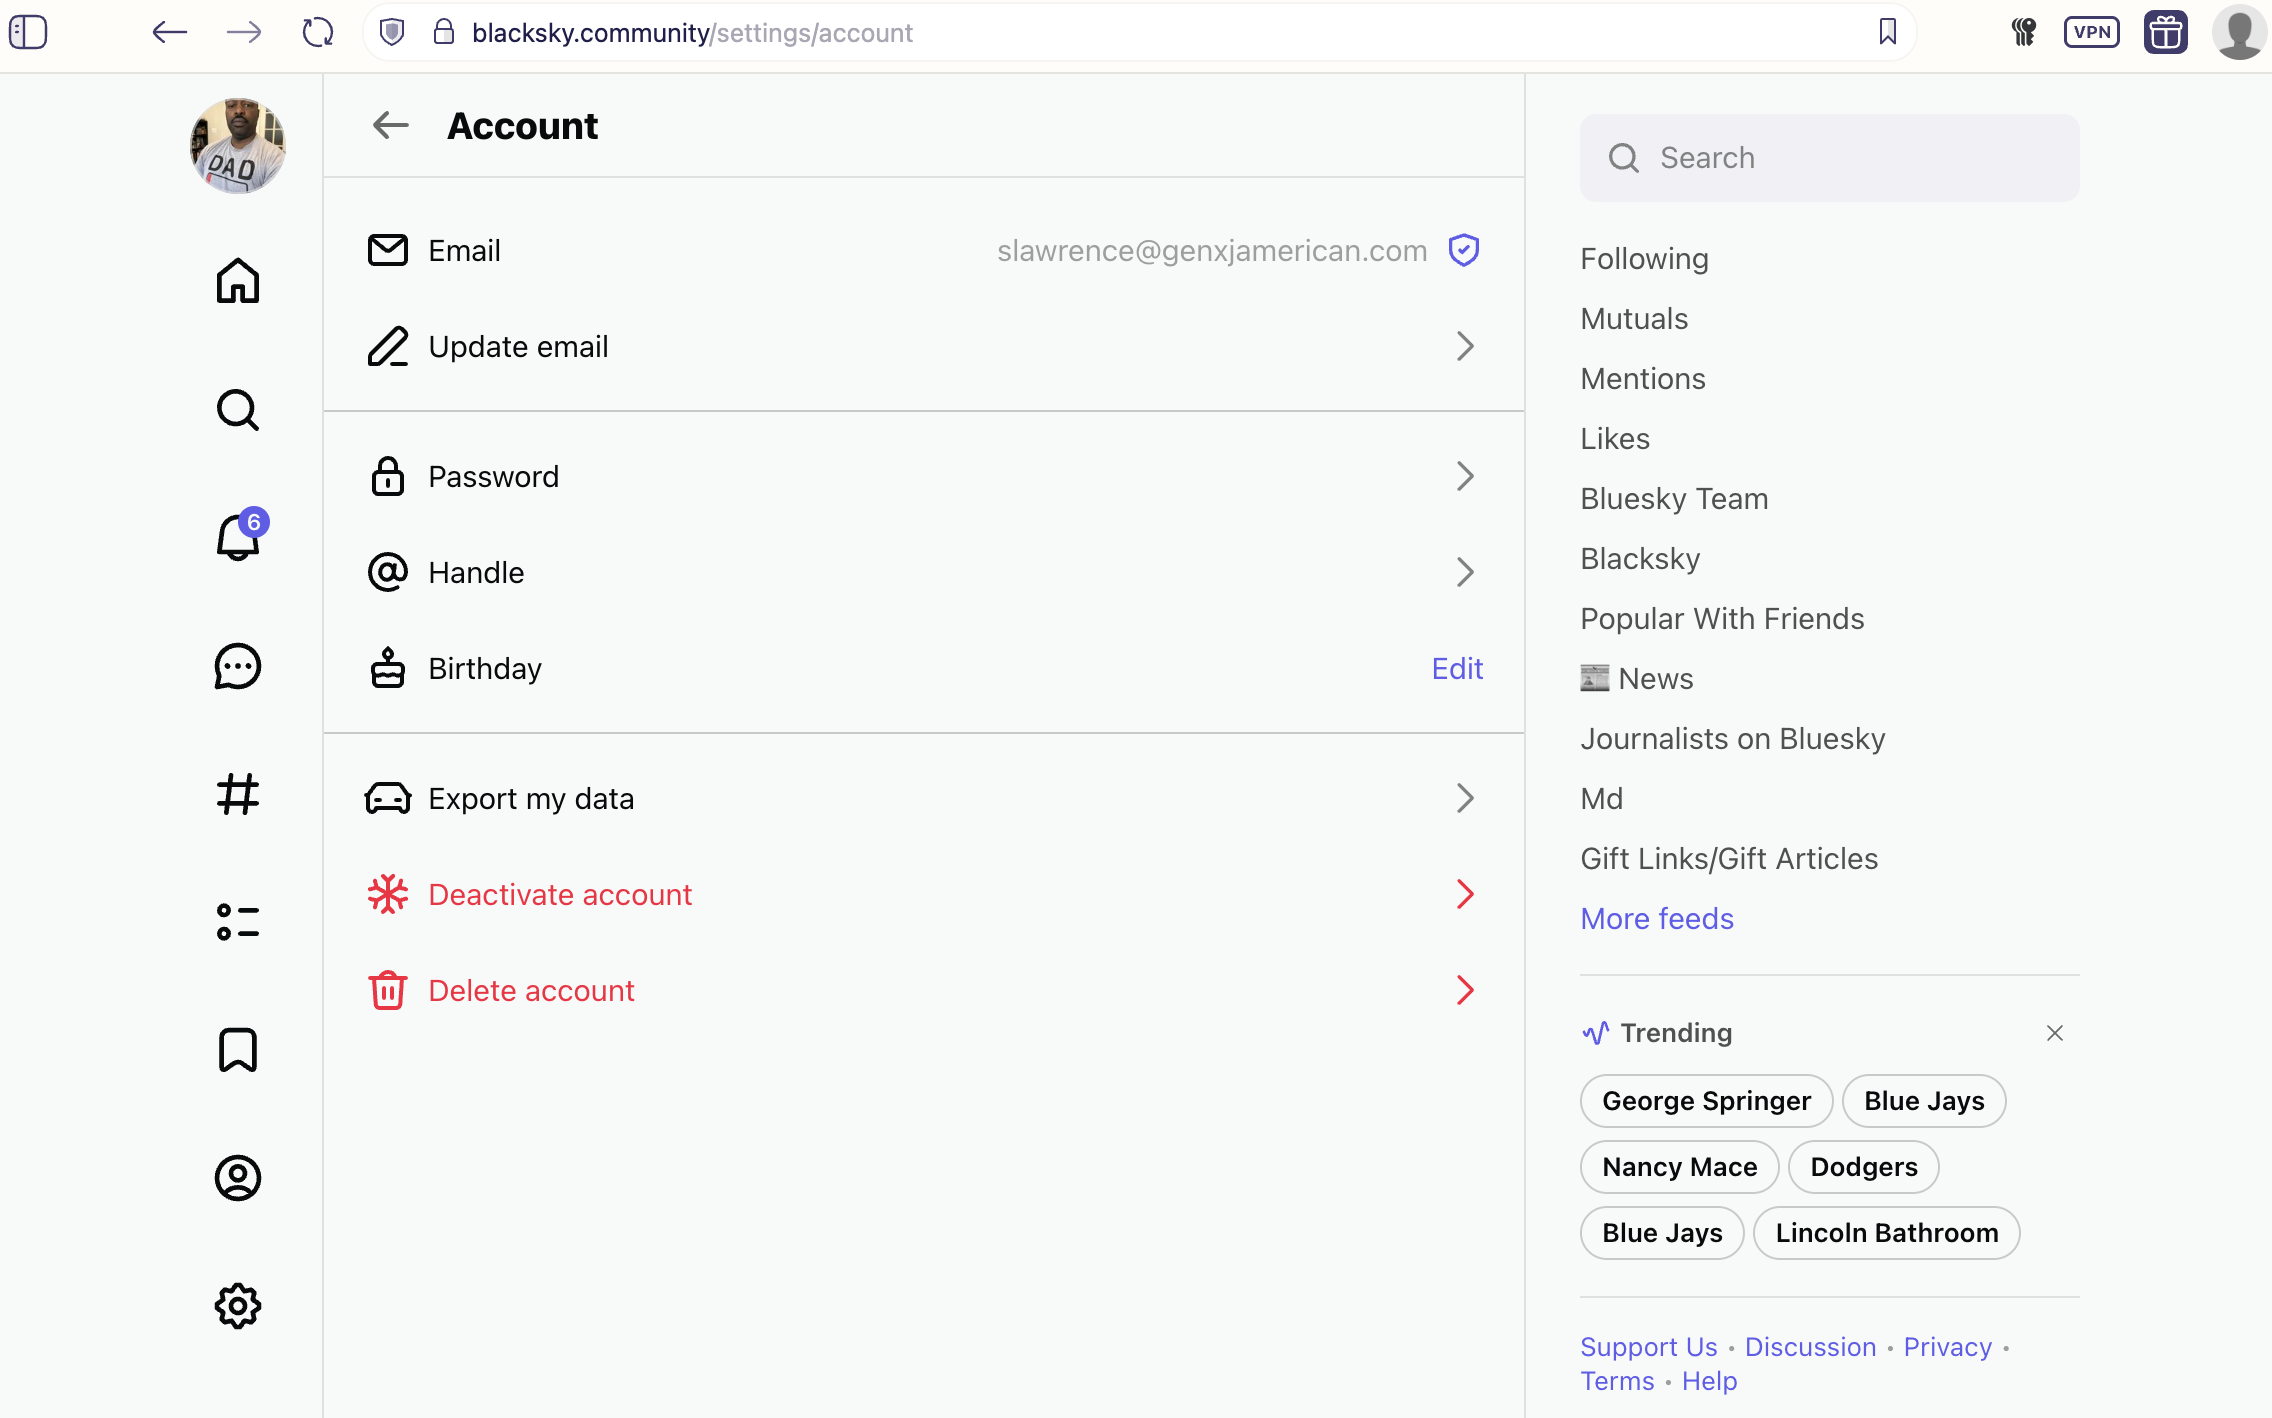
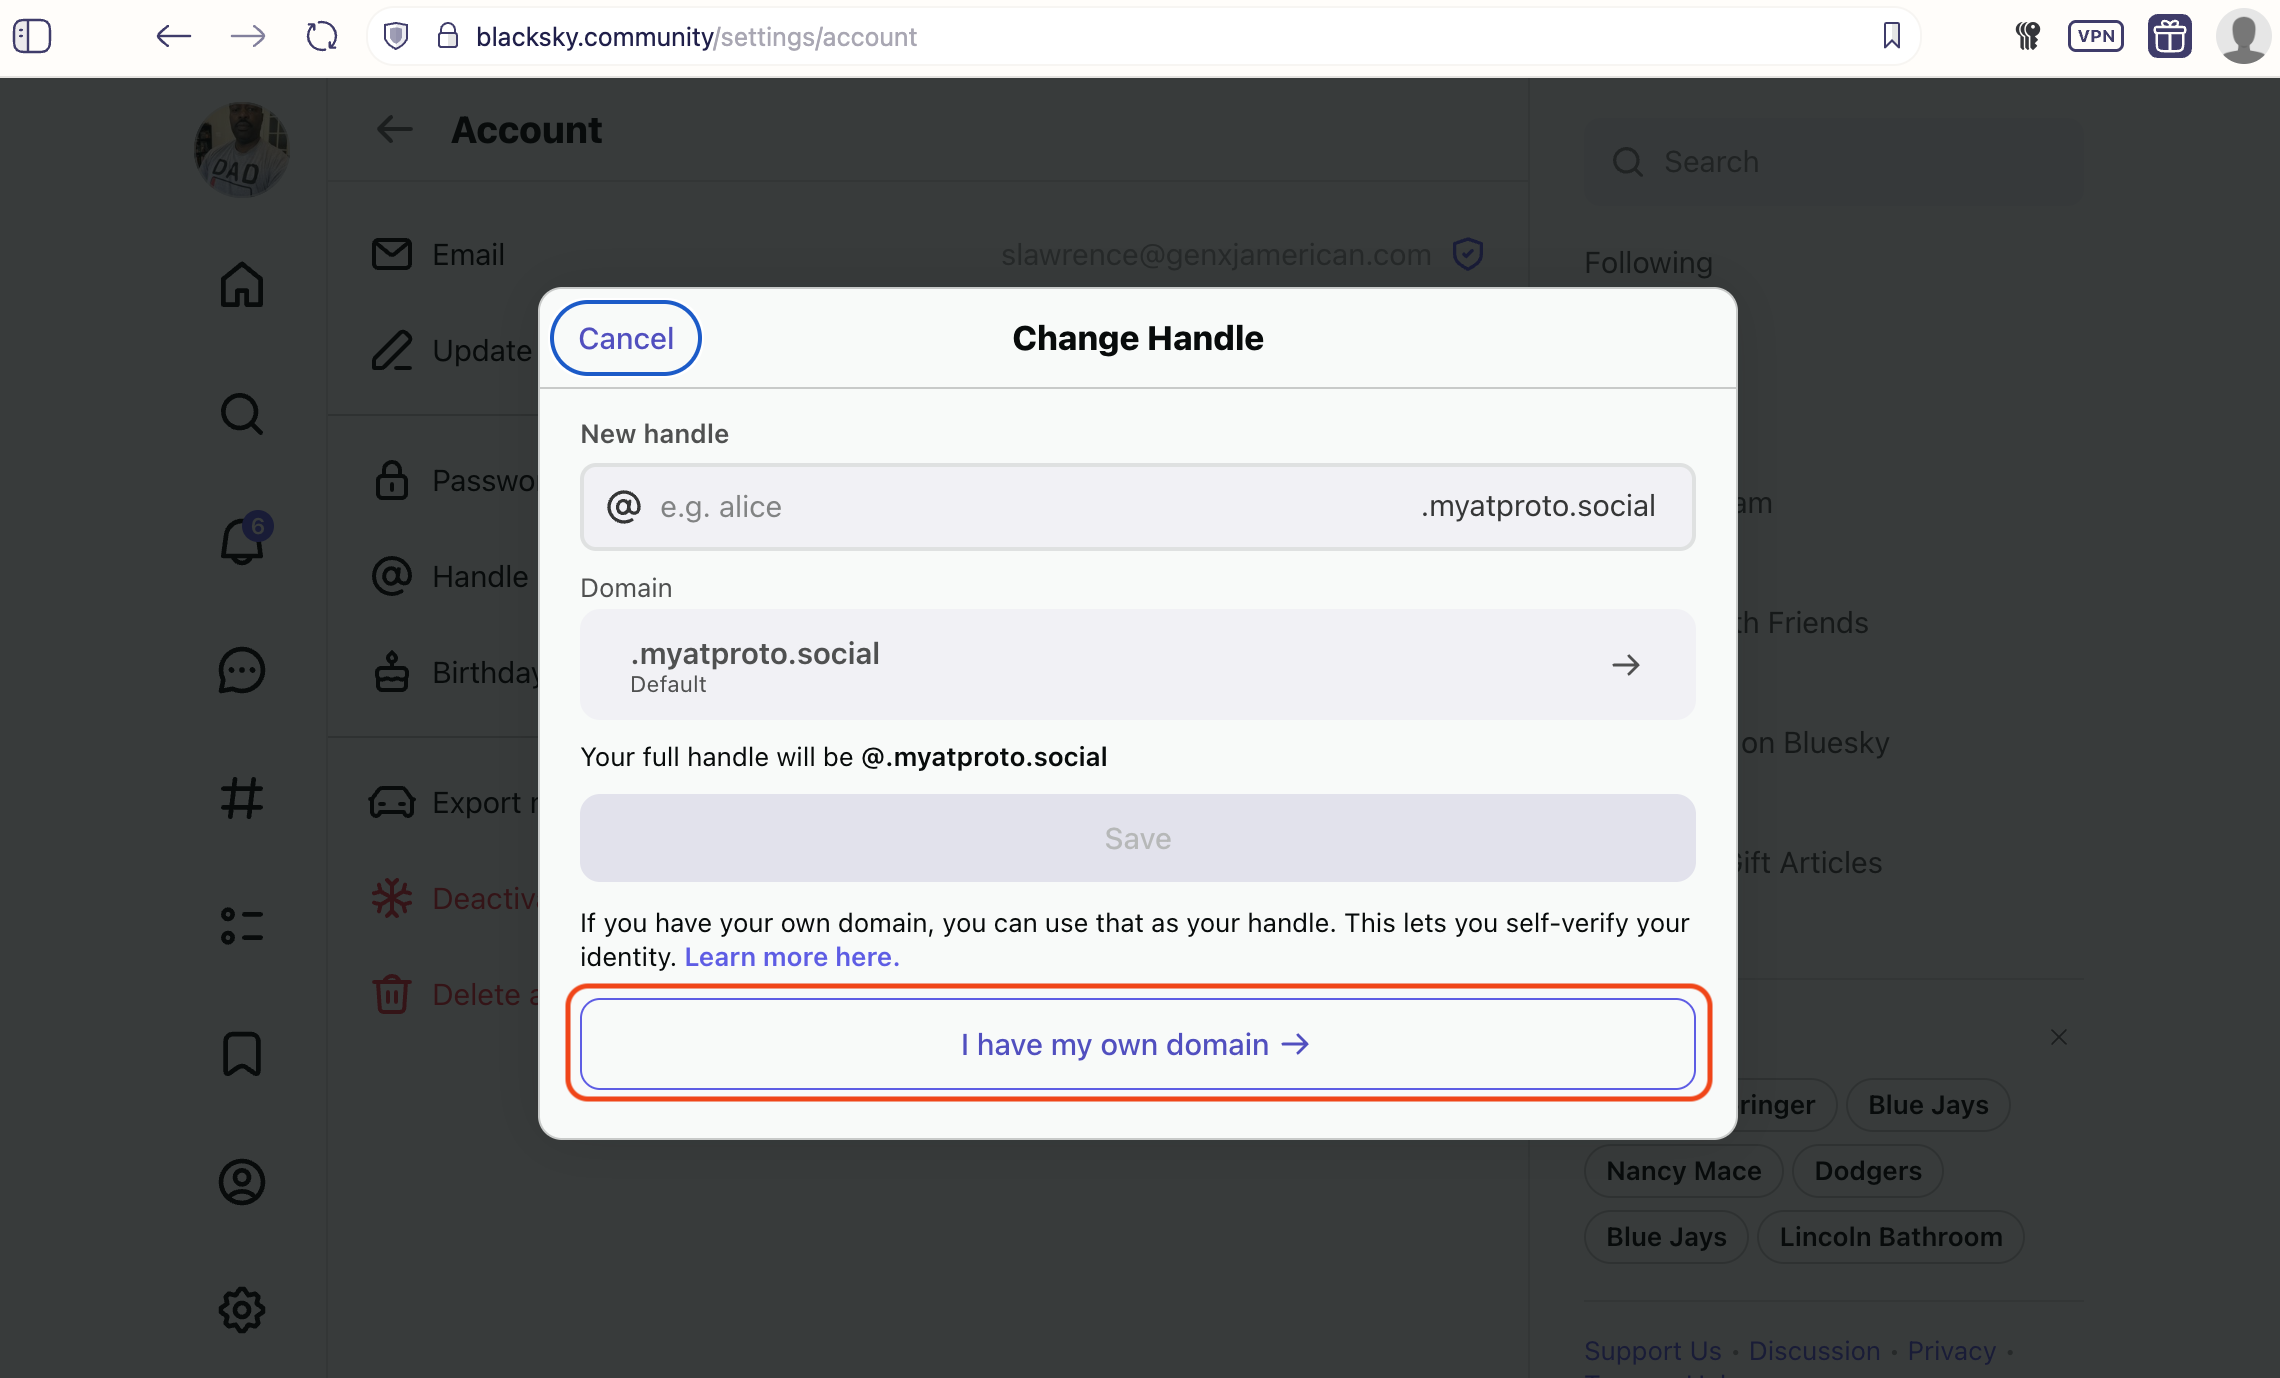
Click Handle and you should see this:
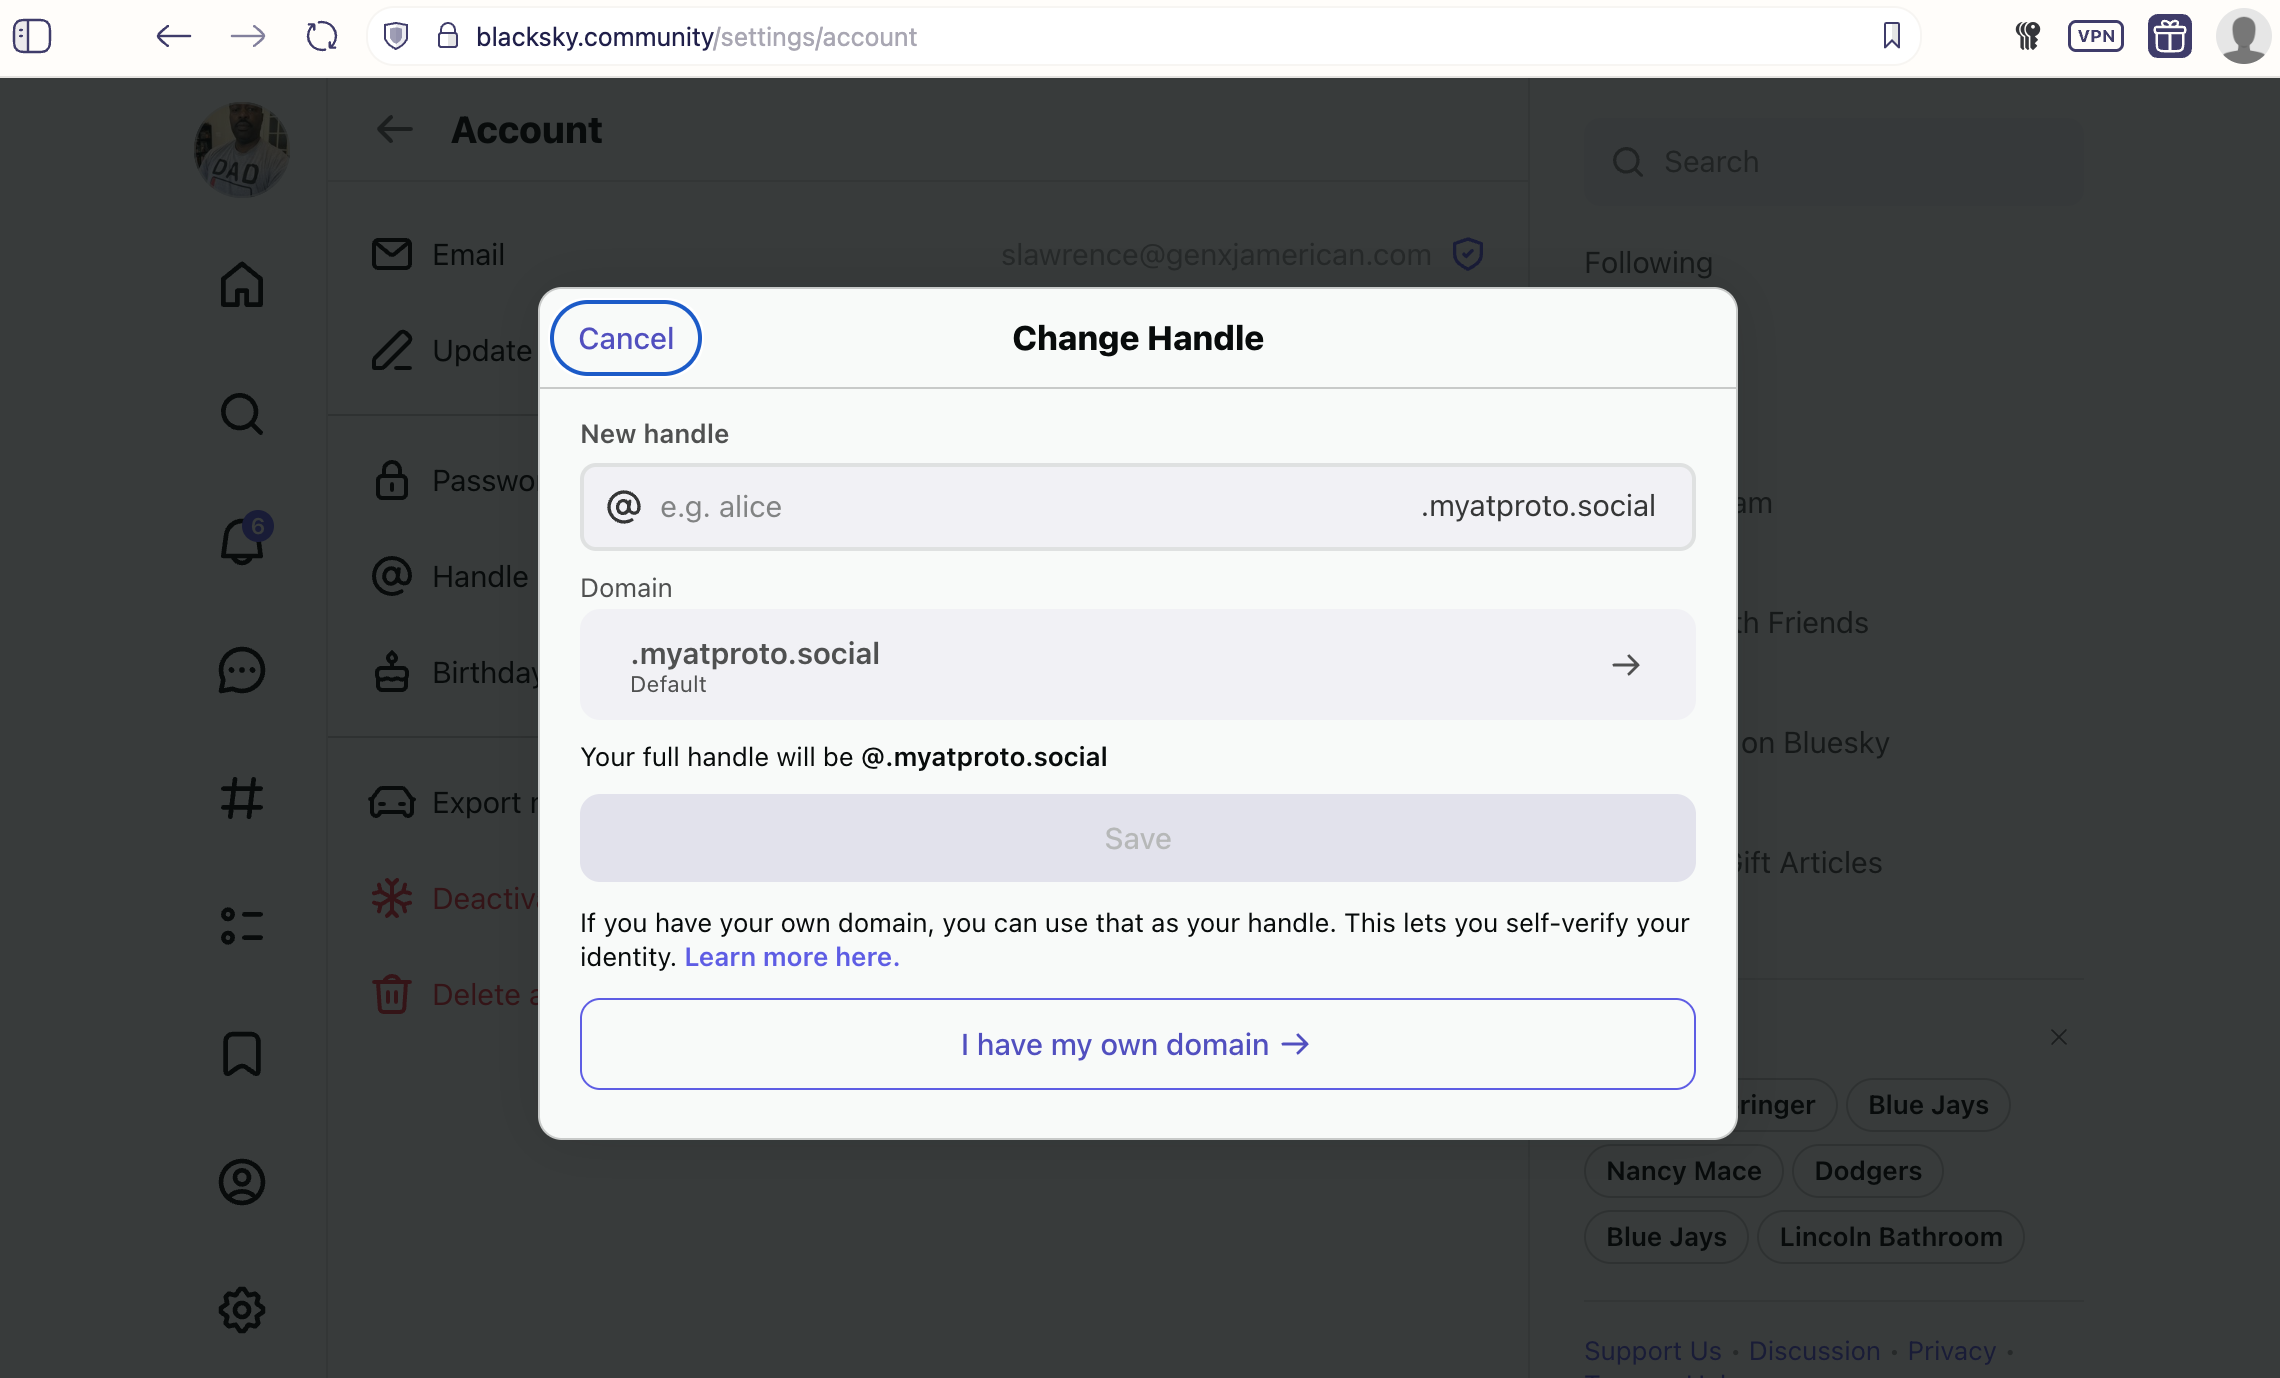
I own the genxjamerican.com domain, so I clicked the “I have my own domain” button as shown here:
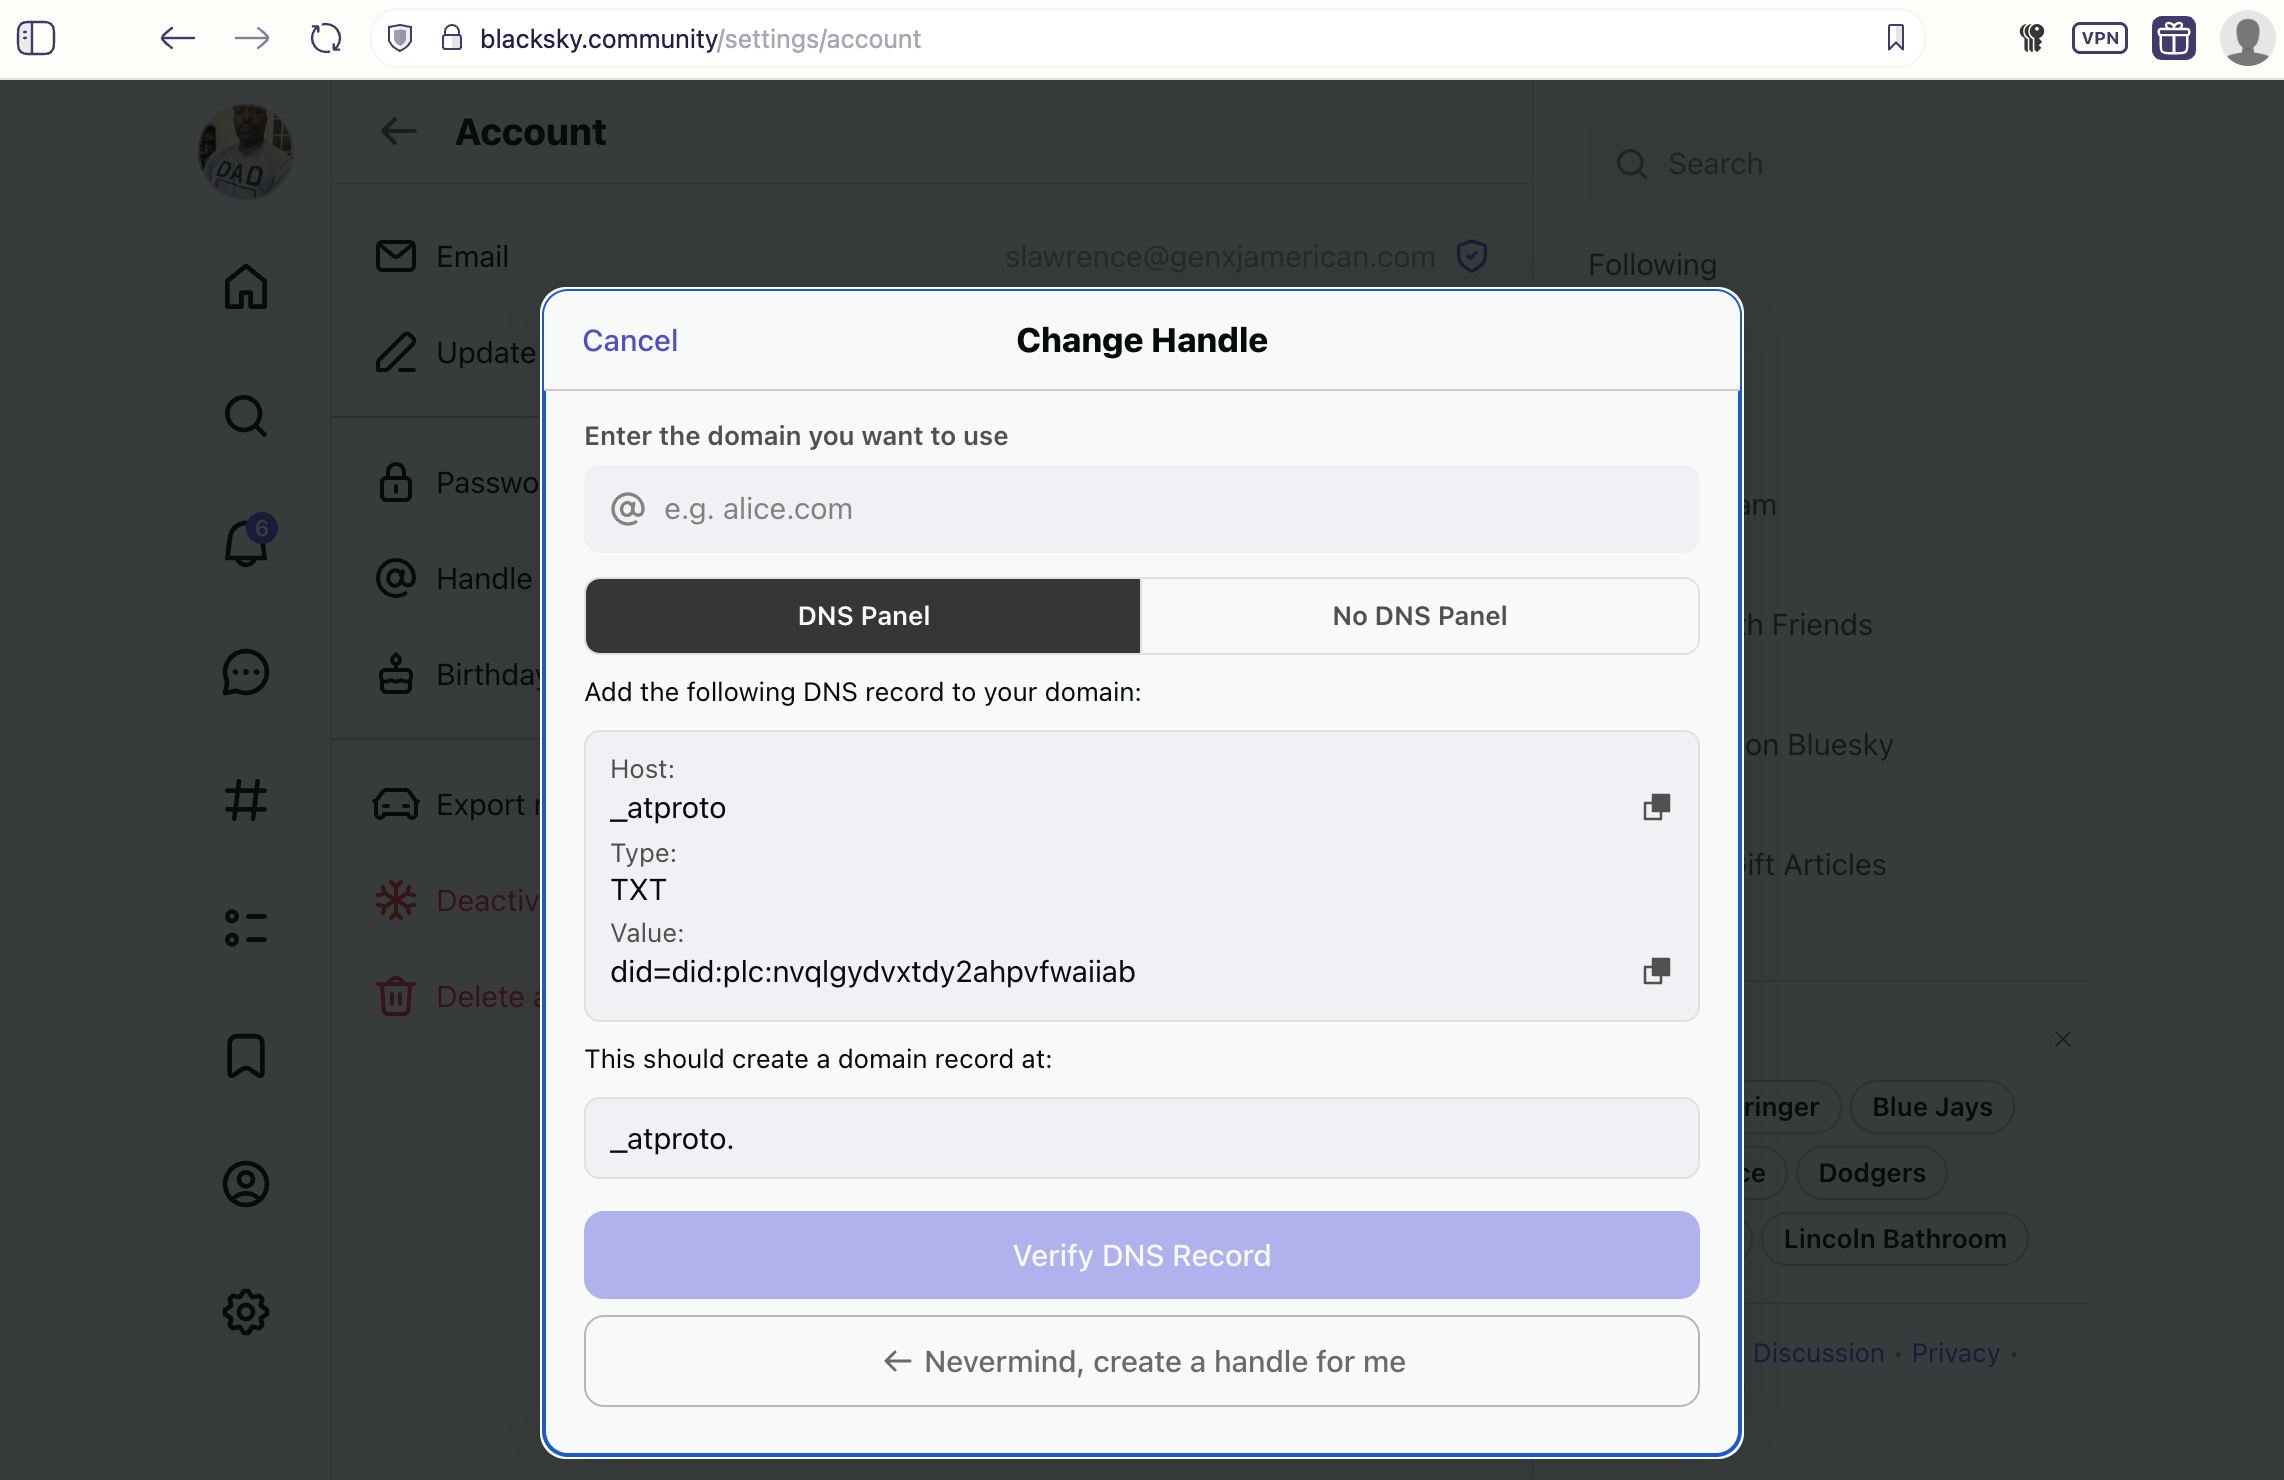
What displayed next for me is this:
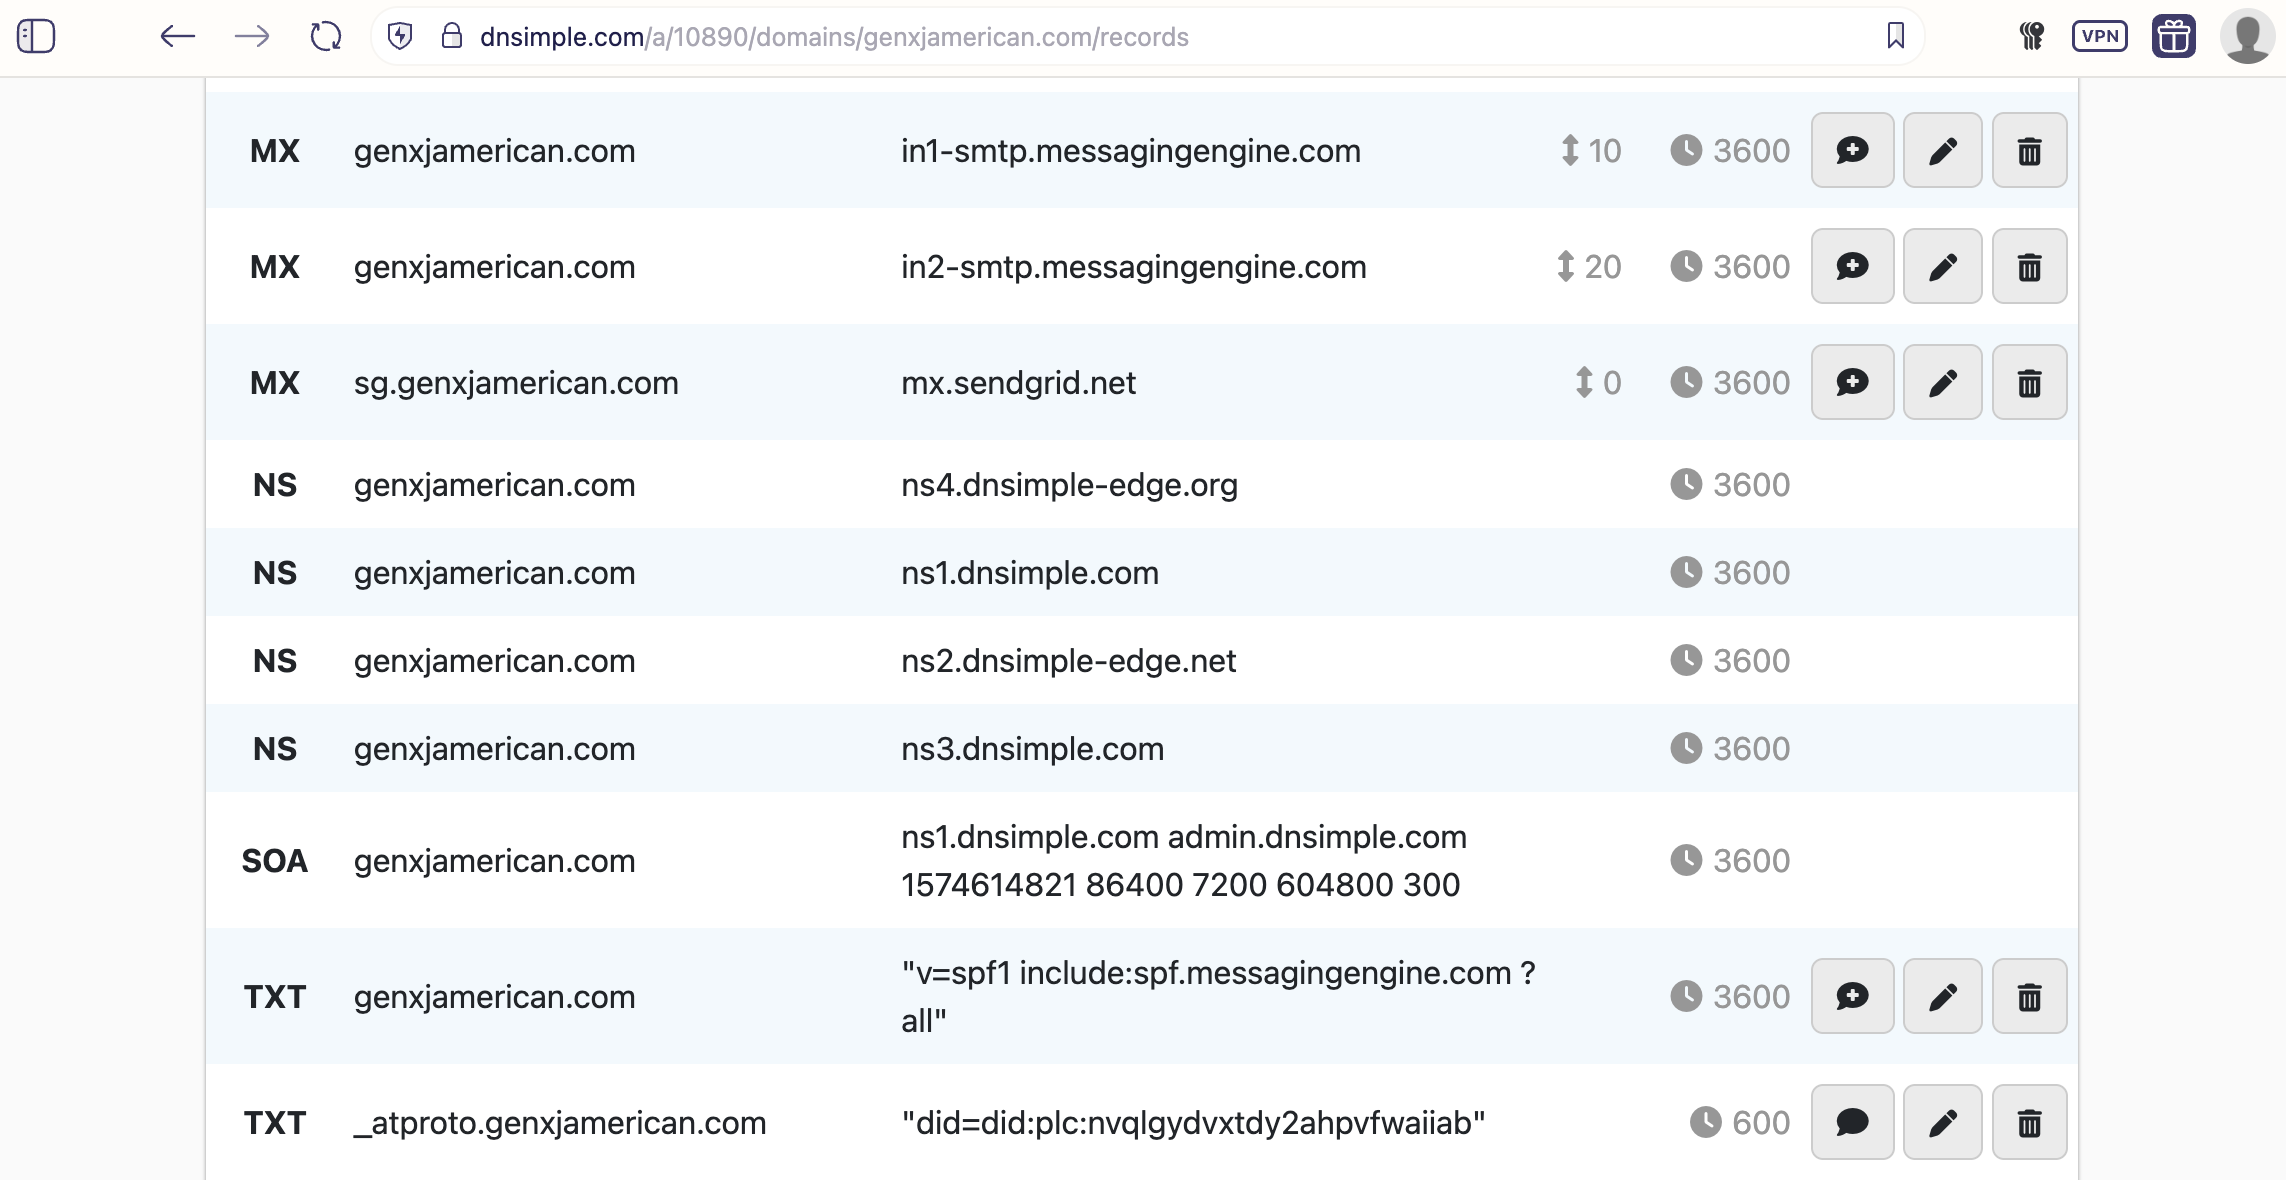
Technically, I didn’t need to update the domain record since I’d switched to that domain soon after joining Bluesky originally. But to change the comment associated the record, I went in here:
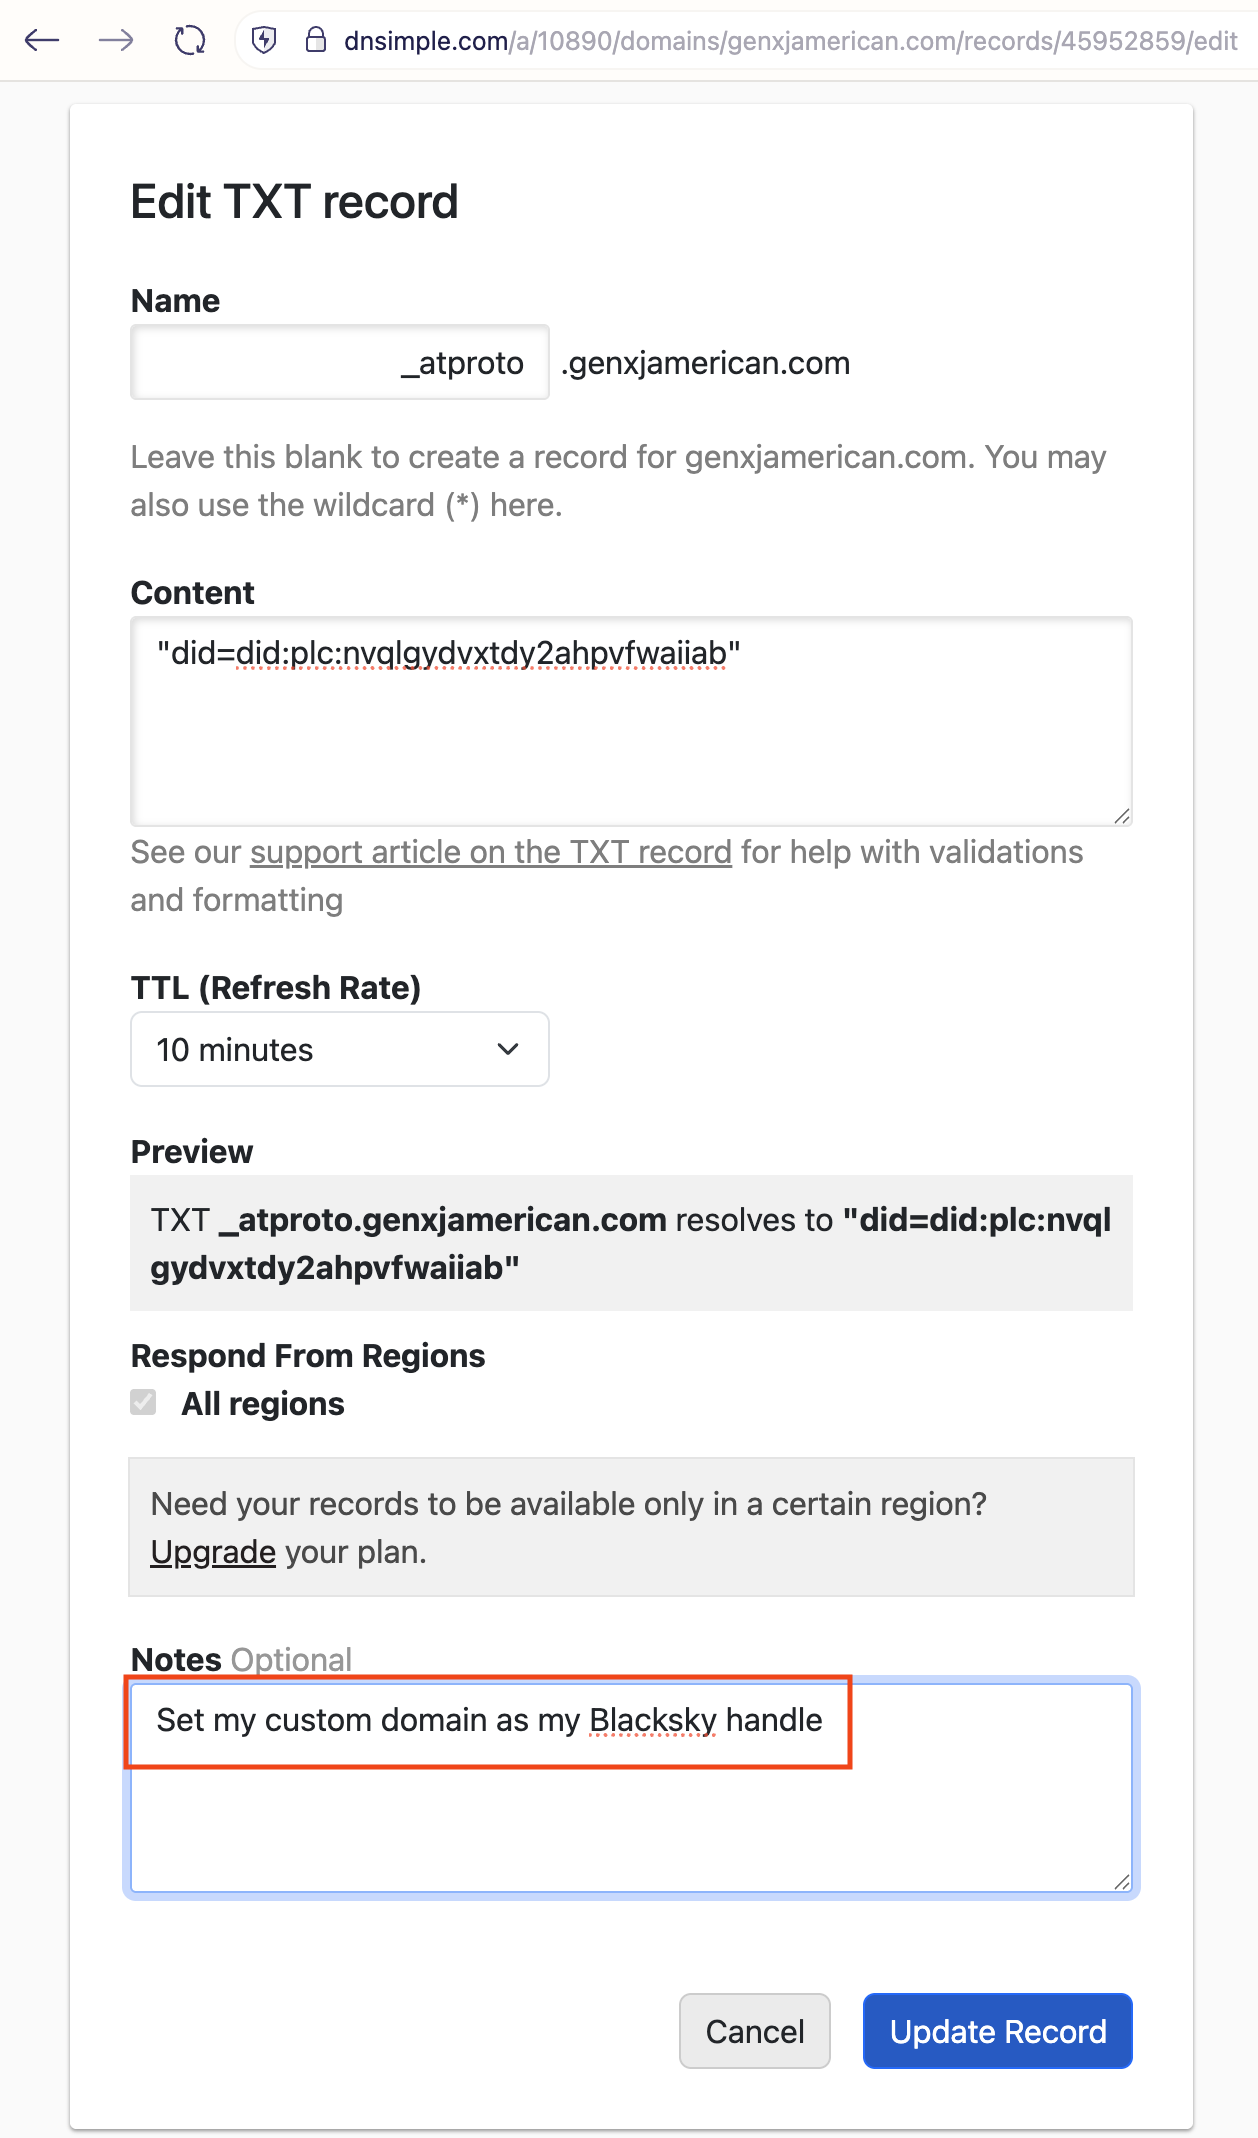
Then I edited the note as shown here and pressed the “Update Record” button:
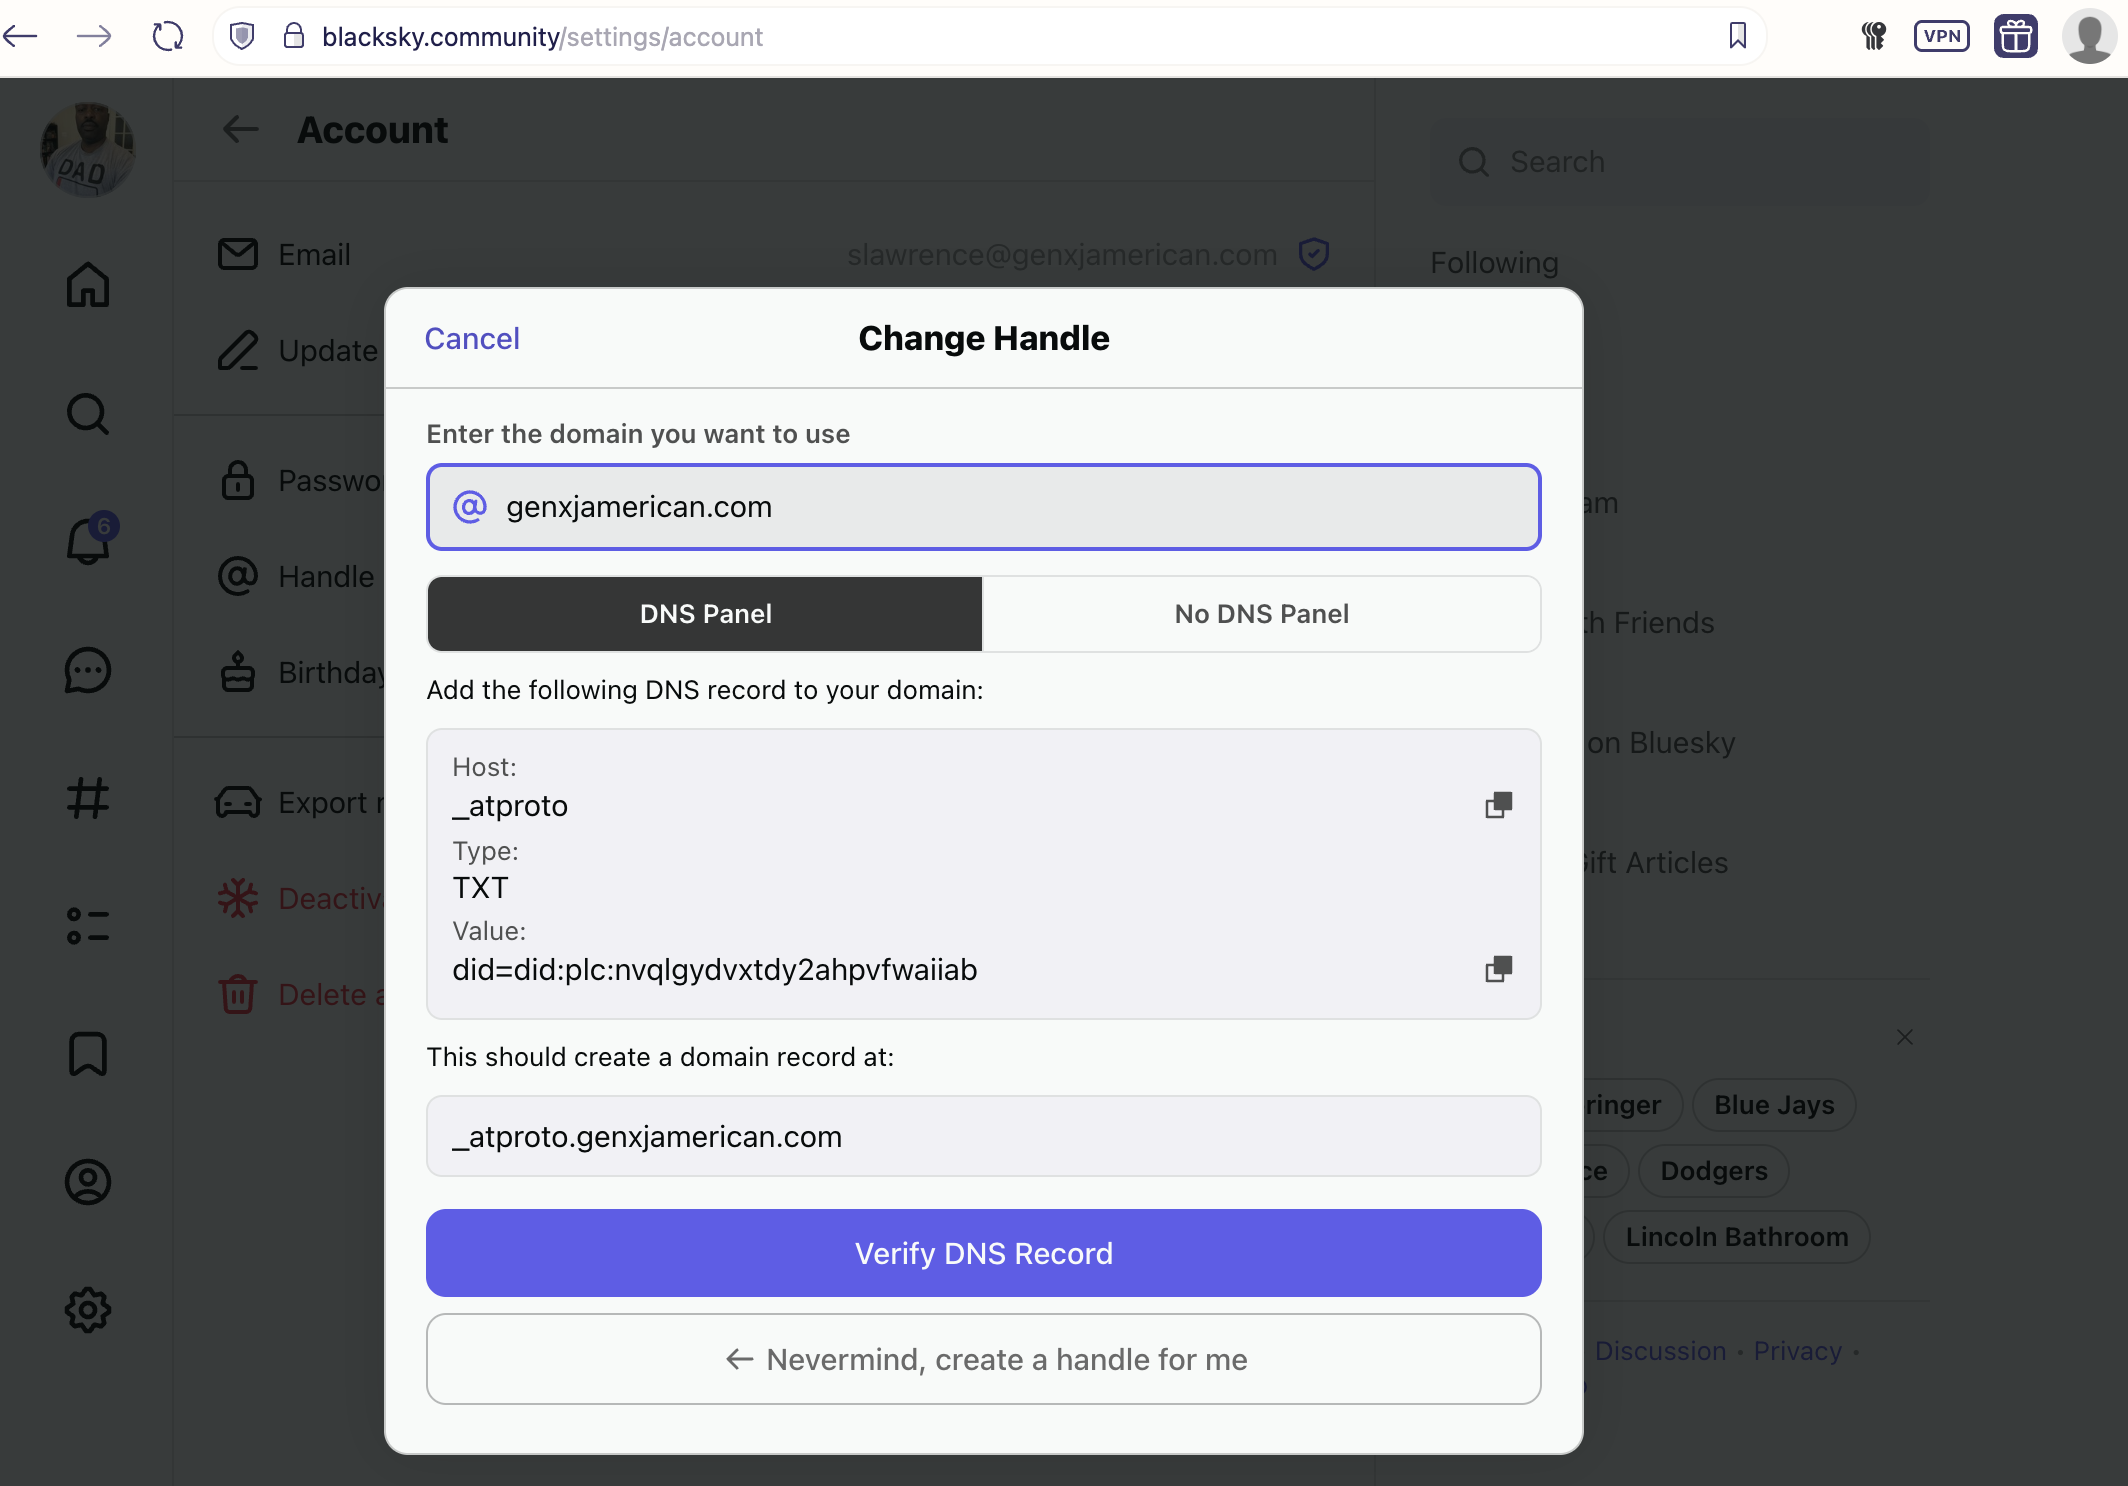
Next I filled in my domain, which automatically filled in the domain record in the modal dialog and activated the “Verify DNS Record” button as shown below:
Pressing the “Verify DNS Record” button updated the modal dialog to this:
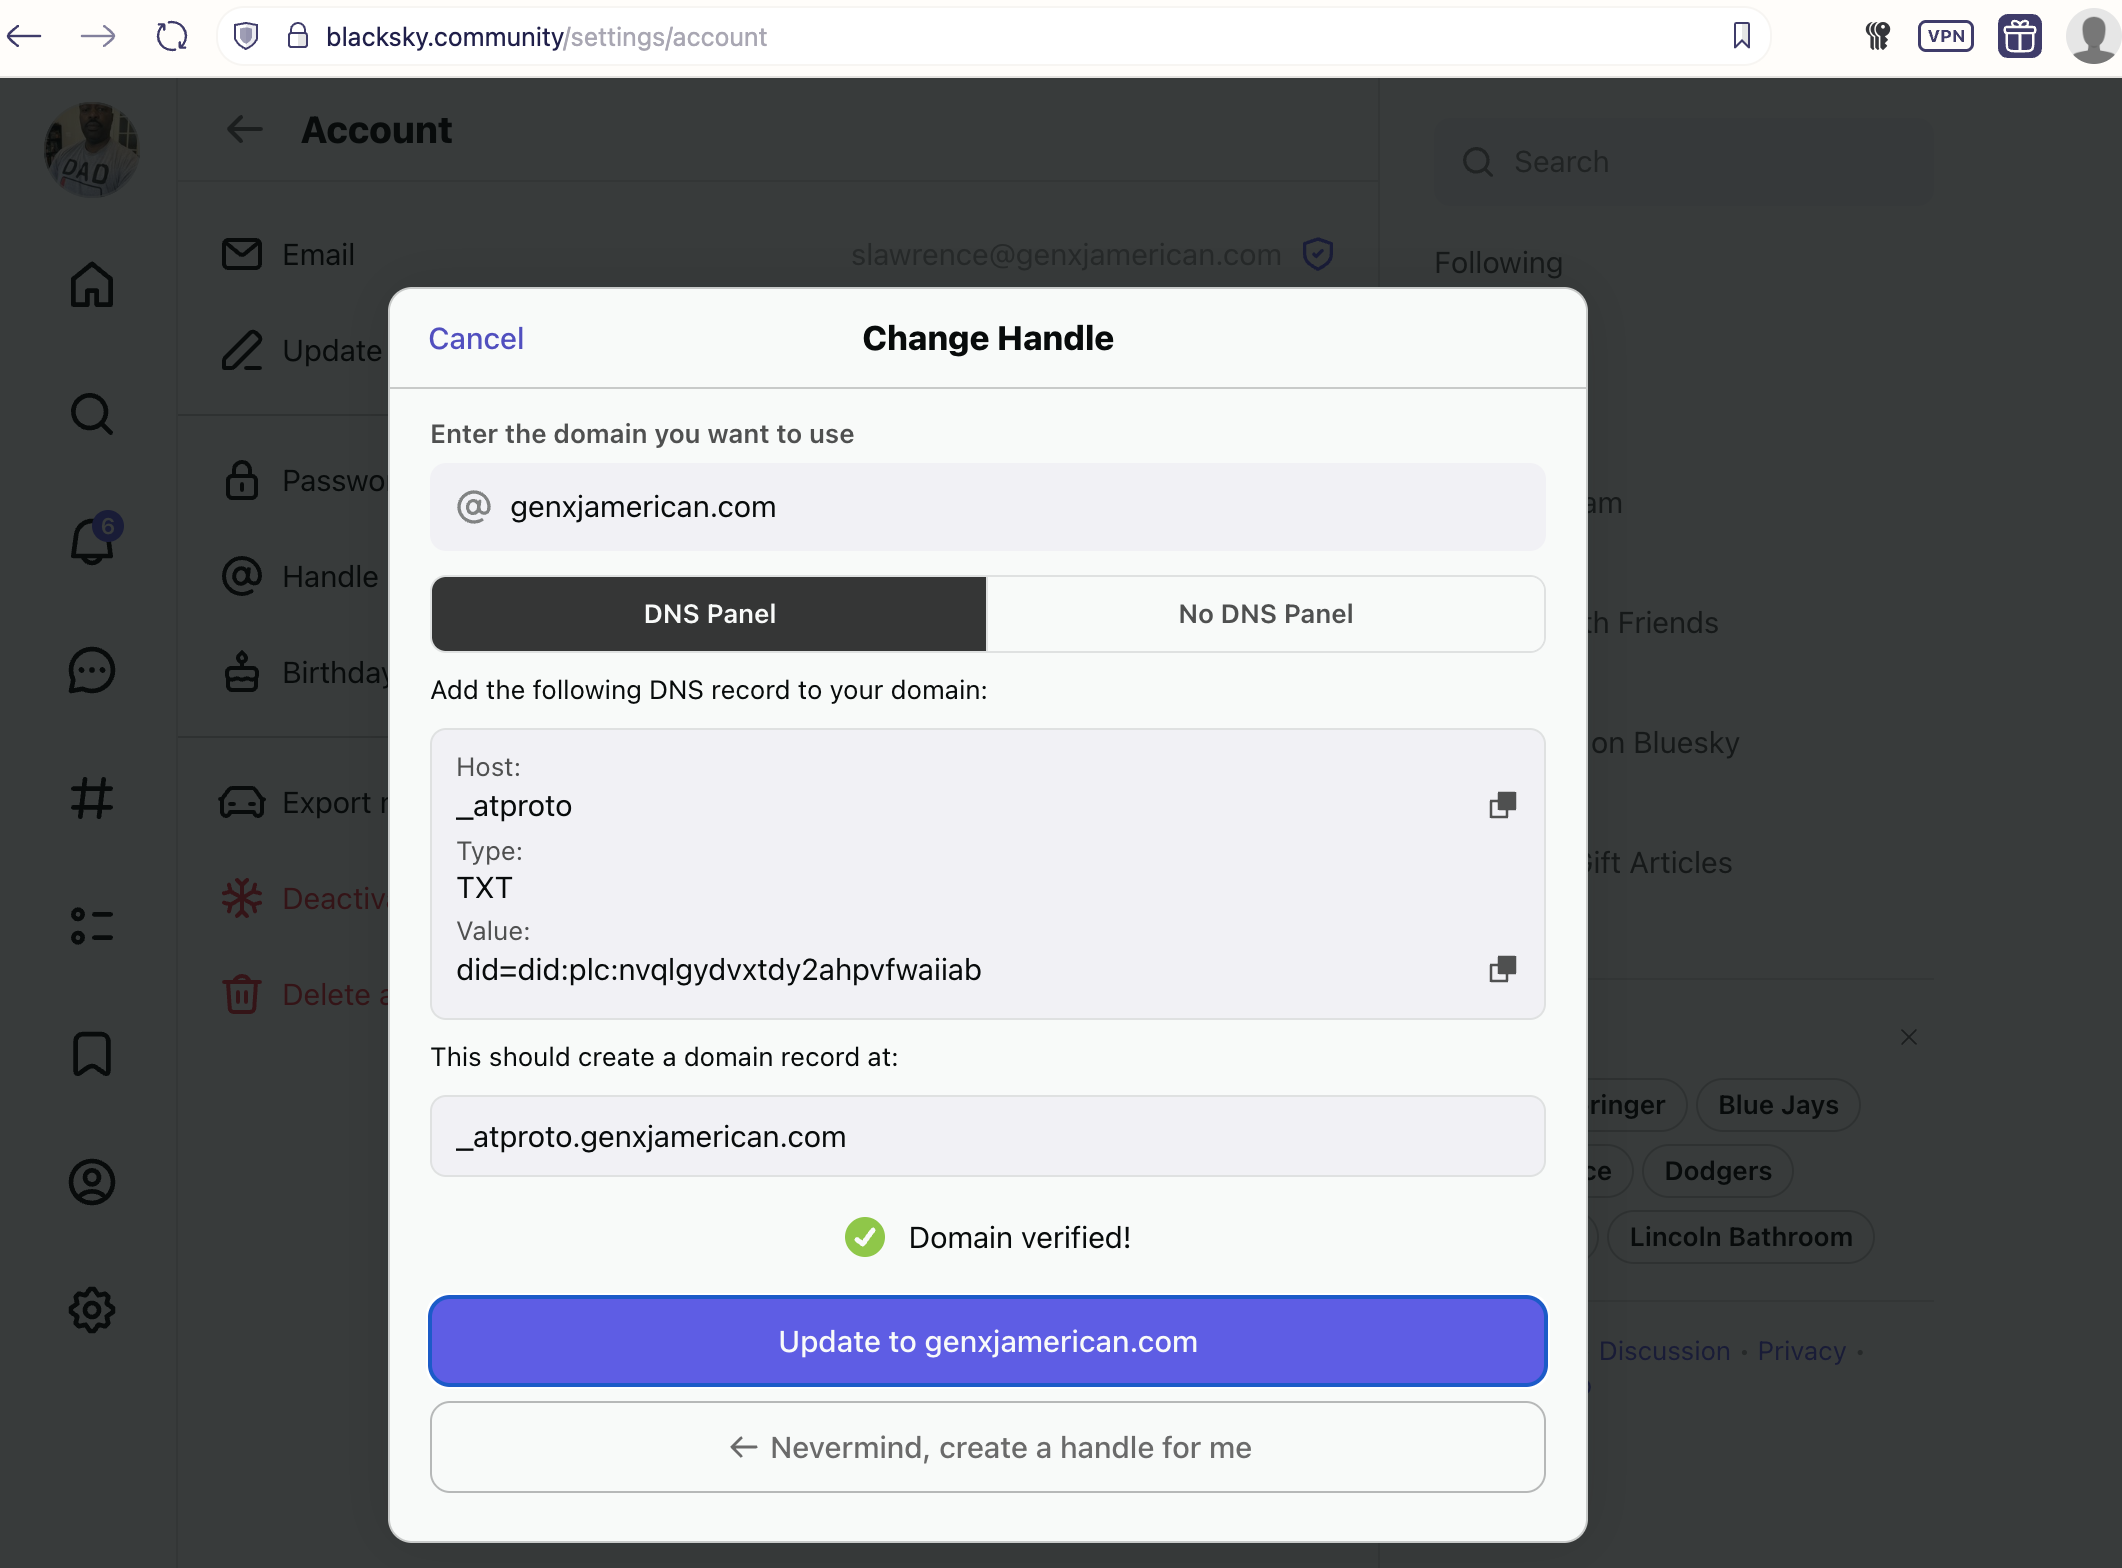
Pressing the “Update to genxjamerican.com” button completed my handle change.